7 TIPS TO TEACH CHILDREN PROGRAMMING BY DISCOVERY
iN ConMasFuturo.com we have a technological academy. Once I had the opportunity to speak with a father that brought his daughter from Toledo. He did it because his daughter loved learning programming. However, that father told me a shocking story. His daughter’s school had started teaching programming. But they were disappointed when their daughter started to tell them that those programming classes were unbearable: What had happened? Why had the classes so little appeal for a girl that loves programming? I am not really sure, but I think I can imagine it.
In traditional teaching, the teacher was the expert, the only one who told you how to do everything, what is correct and what is wrong. That does not work for programming. You learn how to program by doing, by trial-and-error and by discovery, not by someone telling what you must do.
But how can you learn by discovery such a hard skill as programming? It’s easier than you think if you follow seven tips:
TIP 1: SET UP A CHALLENGE
The child has to have a goal, get something. Challenging the child to achieve something motivates and activates him: “I want to achieve it and I will see how I am able to do it”. The challenge gives meaning to the work that is going to be carried out.
The challenge must be something concrete and that the child can easily visualize. Fortunately, that’s very simple in programming: let’s ask him to make a program. In this case we proposed to the children to make a video game similar to the Snake game, you know, that one played on Nokia phones.
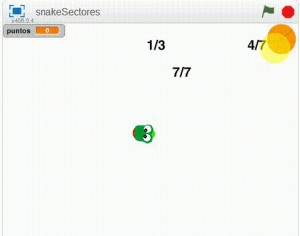
Setting out with this GIF, we get that the child to clearly see what he has to do. We have made the challenge very concrete.
But, of course, if you ask a child to play that game he would be lost, he would not know how to start. Here comes the next trick.
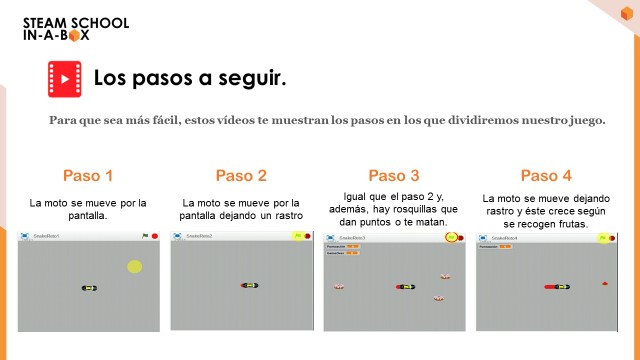
TIP 2: DIVIDE THE PROBLEM
1. The motorcycle moves across the screen
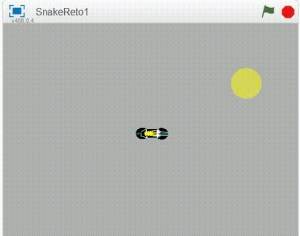
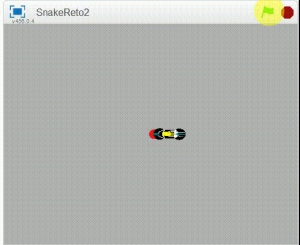
2. The bike moves leaving a track.
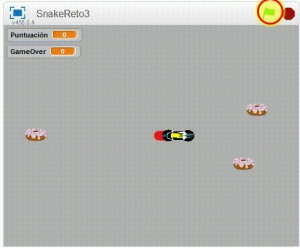
3. In addition, there are donuts that either give you points or kill you.
4. The bike moves leaving a track and this one grows while collecting fruits
By proposing this division we have ensured that there is a work plan, an order.
However, it is still relatively complicated. You have to go a step further in simplifying and get to the simplest basic elements.
TIP 3: DIVIDE THE PROBLEM… RIGHT UP ITS MOST BASIC COMPONENTS
This list of actions are the basic components of step 1
“The object moves 2 steps constantly in the direction that we indicate”.
“We will change the object’s address with the keys, two with keyboard events and two with conditional”.
“If the car touches the edge, the program should stop.”
Those actions a child is capable of doing on its own. Even if he knows very little.
But for children to really understand what they have to do, it is not enough to write the list of basic components of the program in a list and give them that list. So they understand what they have to do, they must think for themselves.
TIP 4: SET UP “SCAFFOLDS” IN THE MOST DIFFICULT STEPS
For children, especially the youngest ones, the abstraction necessary to decompose a program into basic actions is not easy. Neither are meticulous: what they want is to start programming as soon as possible. So when a task is very complex we have to help them. But we have to help them without limiting their initiative and allowing them to be the active protagonists.
There are many ways to do it, so many that it would be a good idea to write an entry on that topic alone. But let’s see at least one as an example.
The expression of a program can be done in three ways, through a flow diagram, through pseudo code or, simply, expressing with words what the program does, step by step.
In this example we have the pseudo code of a home automation program that turns on a light when a presence sensor is activated.
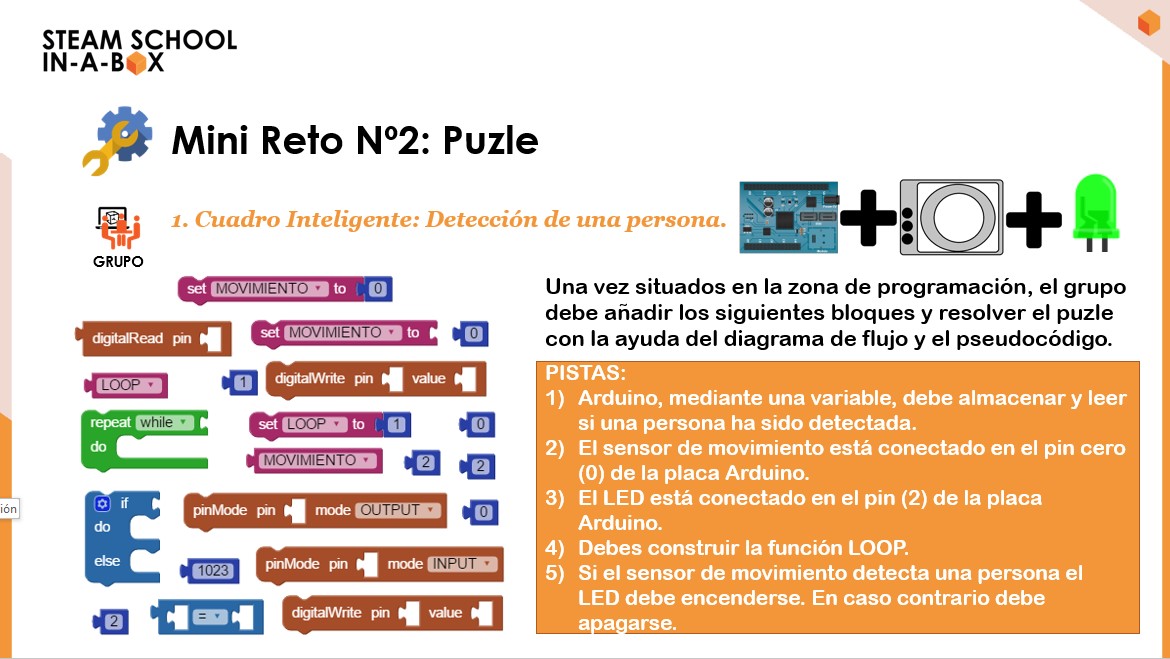
It is very likely that you are not a programmer. If so, I challenge you to mentally try to assemble the programming puzzle with the pieces that we propose in the image and following the clues. If you understand some English and by pure logic is likely to be able, at least, to start attacking the problem. But you may also feel a little overtaken by the task. Again, it is a question of offering “scaffolding”. Perhaps you could feel overtaken now, but children are assisted nº5 and nº6 tip.
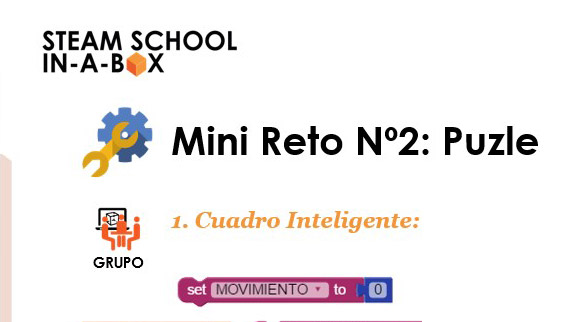
TIP 5: USE TEAMWORK ALONG WITH INDIVIDUAL WORK
If you want to teach how to program, you should mix wisely the individual tasks and group tasks. For example, the task of the puzzle was designed to be solved as a team, as can be seen in the image.
Why is that important? If you are presented with a challenge like this, you can be in a dead-end street. If you do it in a group, it is likely that someone’s idea inspires a new line of work. Or that your point of view avoids the error of another partner. Thinking aloud and in a group is a way to support each other. The moments of doubt of one are overcome by the intervention of another. And, besides, it’s more fun.
But group work can cover the lack of initiative of individuals. It is essential that the child also faces tasks individually.
If you want to design a good programming course you should design a wise and effective sequence of individual tasks and group tasks.
TIP 6: ENCOURAGE TRIAL-AND-ERROR
I have asked you to solve a programming puzzle using only your intelligence. Children, on the other hand, have the advantage of being able to test their ideas. That factor is key in programming. When designing your educational material you must design tests that can be solved by trial and error. This methodology empowers the student and places him as an active protagonist in the learning center.
But you cannot work only by trial and error if you are not equipped with the right basic concepts. The solution to that is trick number 7.
TIP 7: BE SURE OF THE CONCEPTS THAT ARE NECESSARY TO SOLVE A PROGRAM AND DELIVER THE CHILDREN THE TOOLS THEY MIGHT NEED
When you are going to design a programming challenge, you must know what concepts needs a child to be able to solve it. We call that basic skills “pills.” This slide is a map of the pills that a child should control to be programming a game like Snake’s
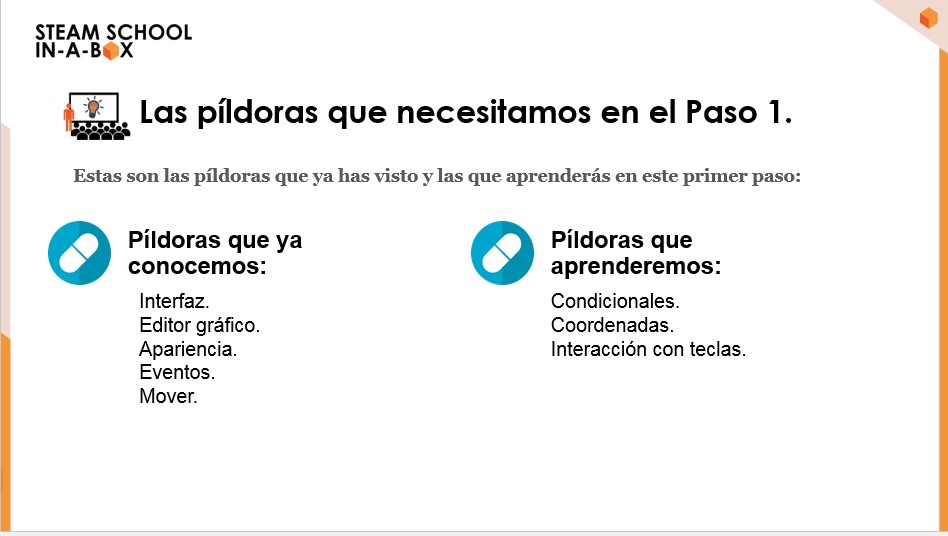
As you can see, we have divided the pills into two groups: those that the child already manages and those that do not. Those that are already known should not be put back to work. But the new ones will have to be worked explicitly (the explanation of how to do it will be the reason for the next blog entry).
At this point, with these tools and with the right material, a child can learn how to program by discovery.